How to access your Microsoft 365 email in a web browser
Your company email lives in Microsoft 365, which means you can read and send it from any computer with a web browser. No software to install, nothing to configure. This guide walks you through signing in for the first time and finding your way around.
1. What you need first
- A web browser
- Microsoft Edge, Google Chrome, Safari, or Firefox. Any current version works.
- Your email address
- Your full work address, such as jsmith@yourcompany.com. Not just the part before the @.
- Your password
- The one Lentner Technology or your IT contact gave you. If you have never used it, you may be asked to change it on first sign-in.
- Your phone
- You will set up a passkey, which lets you sign in with your fingerprint or face instead of a code. This takes about five minutes and only has to be done once. See Setting up your passkey below.
2. Signing in
Open your browser and go to outlook.office.com. Type it into the address bar at the top, not into a search box.
If the address changes to something like outlook.cloud.microsoft after the page loads, that is normal. Microsoft redirects you automatically.
Enter your full work email address, then click Next.
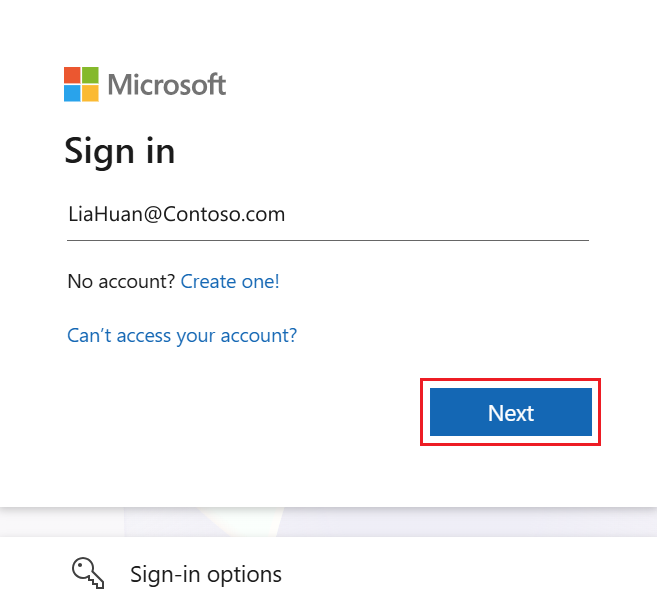
Enter your password and click Sign in.
Some companies use a branded sign-in page with their own logo and background. If yours looks different from the picture above, that is expected. The steps are the same.
You may see a Stay signed in? prompt. This controls whether the browser remembers you next time.
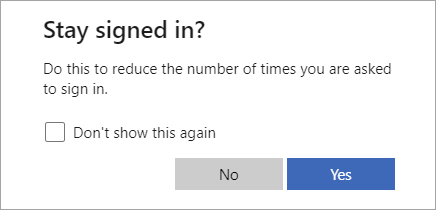
On a shared or public computer, always choose No. Otherwise the next person who opens that browser may land straight in your mailbox.
3. Why we use passkeys
A password alone is not enough to protect a mailbox. Passwords get guessed, reused across sites, and handed over to convincing fake login pages. So every account needs a second proof of identity.
The method we set up for you is a passkey. Instead of typing a code, you unlock your phone with your fingerprint or face, and that is it. Two reasons we prefer it:
- It cannot be phished. A passkey is tied to the real Microsoft sign-in page. If you land on a convincing fake, the passkey simply will not work, which is exactly what you want. A texted code, by contrast, can be typed into a fake page or intercepted.
- It is faster. No app to open, no digits to copy across. Most sign-ins become a single touch of a fingerprint sensor.
Text message codes are going away. Microsoft is retiring its built-in SMS and voice call verification. From September 1, 2026 passkeys become the default, and from February 1, 2027 anyone still relying only on texted codes will be forced to register a passkey before they can sign in. Setting one up now means nothing changes for you later.
4. Setting up your passkey
Do this once, from a computer, with your phone next to you. You will need to sign in with your password first, since Microsoft has to confirm it is really you before it will trust a new passkey.
On your phone, first
Install Microsoft Authenticator from the App Store or Google Play. It is free and published by Microsoft Corporation. Your phone also needs a screen lock (a PIN, fingerprint, or face unlock). If you do not have one, set it up now, because a passkey will not work without it.
Check your phone is recent enough. Passkeys in Authenticator need iPhone on iOS 17 or newer, or Android 14 or newer, with Android 15 preferred. Older phones can still use the approval method described in section 6.
On your computer
Go to mysignins.microsoft.com/security-info and sign in with your work email address and password.
Click + Add sign-in method.
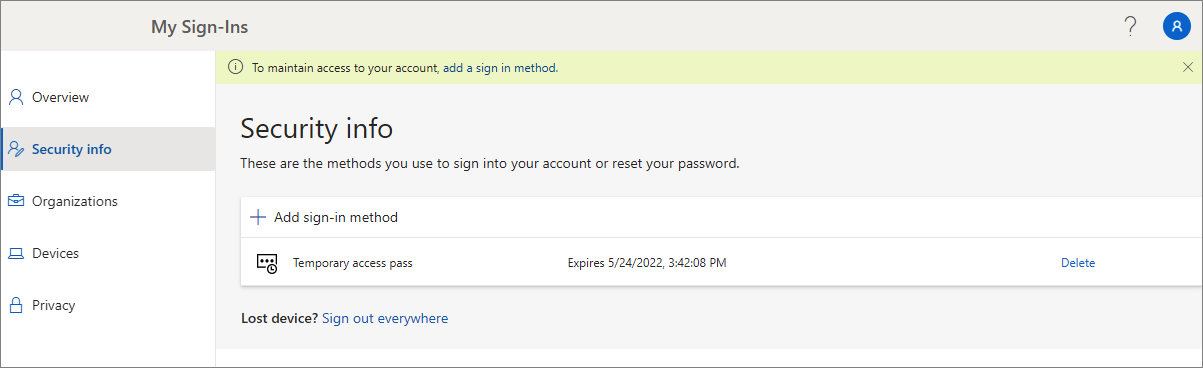
Choose Passkey in Microsoft Authenticator from the list, then click Next. You may be asked to confirm your identity again.
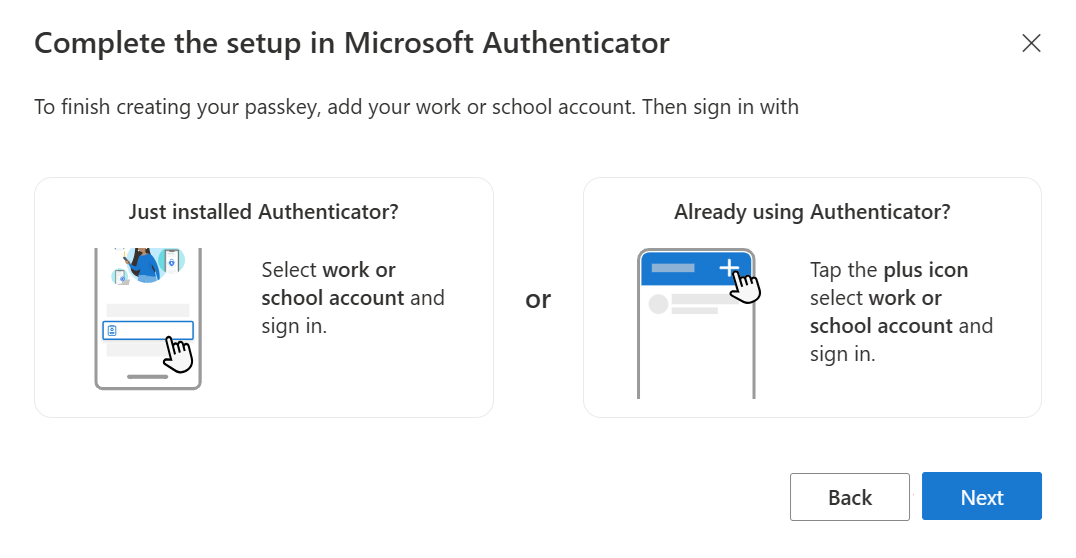
The screen now asks you to finish in the Authenticator app. Leave this page open and pick up your phone.
Back on your phone
Open Authenticator. If your work account is not there yet, tap +, choose Work or school account, and sign in. If it is already there, tap the account and choose Create a passkey.
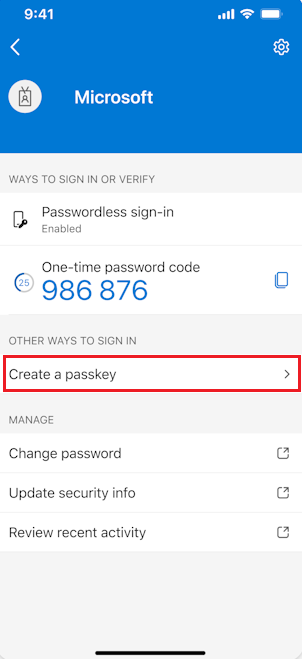
Authenticator will ask permission to act as a passkey provider. Tap Settings and turn it on:
iPhone: Settings, then General, then AutoFill & Passwords. Turn on AutoFill Passwords and Passkeys and tick Authenticator.
Android: Settings, then Passwords & accounts. Under additional providers, tick Authenticator. The wording varies by handset, so search your settings for "passkey" if you cannot find it.

Return to Authenticator and tap Done. Passkey should now be listed under your account.
Finishing up
Go back to the computer and click Next. It checks that the passkey exists, then confirms it is ready.

Your passkey now appears in the Security info list alongside your other methods.
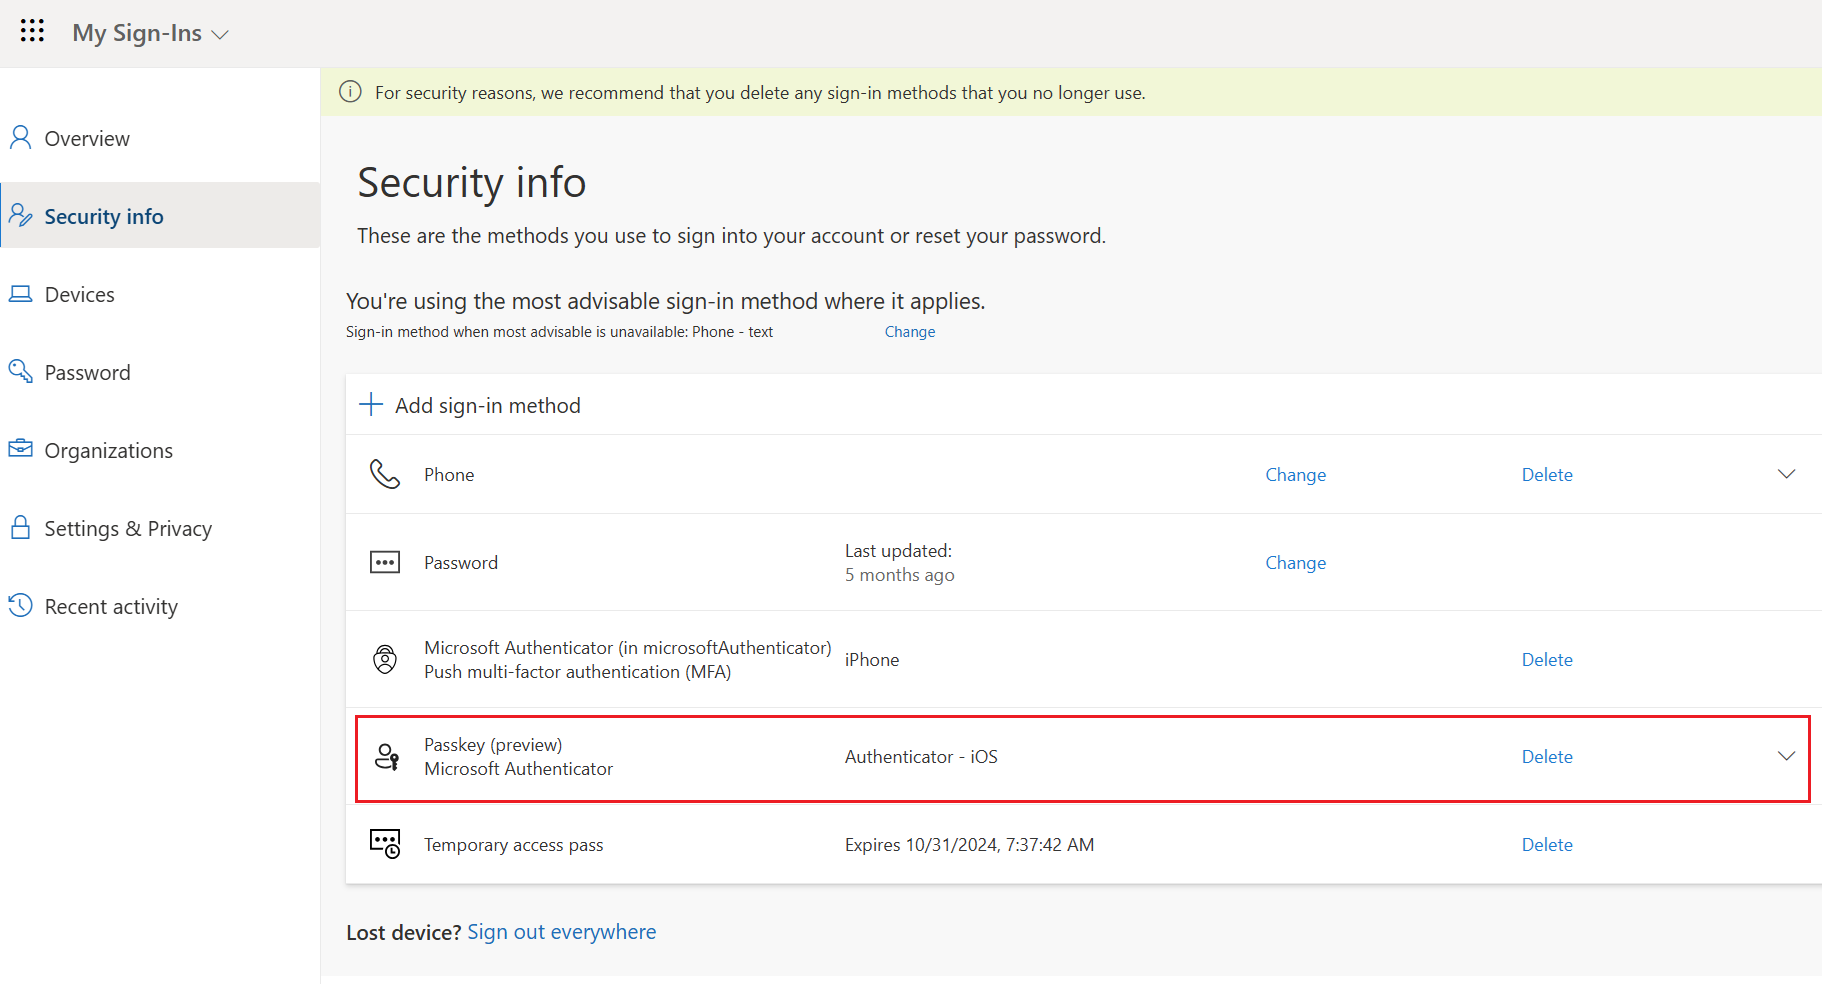
Register a second method while you are here. If your only passkey is on a phone that gets lost, dropped, or replaced, you are locked out until we reset your account. Add a passkey on a second device, or a hardware security key, so you always have a way back in. Ask us which option suits your setup.
Not seeing a passkey option? Passkeys have to be switched on for your company before they appear in that list. If Passkey in Microsoft Authenticator is missing, contact us at support@lentner.com and we will enable it.
5. Signing in with your passkey
From now on, most sign-ins take a couple of seconds and no password at all.
On a device that holds your passkey
Go to outlook.office.com, enter your email address, and confirm with your fingerprint, face, or device PIN when prompted. That is the whole process. If you have signed in with a passkey recently, you may only need to pick your account from a list.
On a different computer, using the passkey on your phone
On the sign-in page, click Sign-in options underneath the boxes, then choose Face, fingerprint, PIN or security key.

Choose iPhone, iPad, or Android device.

A QR code appears. Scan it with your phone's camera. Both devices need Bluetooth and an internet connection turned on.

Approve on your phone with your fingerprint or face. The computer shows Device connected and your mailbox opens.

6. If a passkey is not available yet
Until your passkey is set up, or on a device that does not support one, you will sign in with your password and then approve a prompt in Microsoft Authenticator instead.
If this is your very first sign-in, Microsoft will insist you set that up before letting you into your mail:
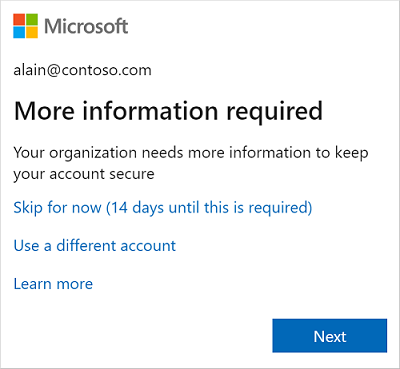
Follow the prompts to connect Microsoft Authenticator to your account. After that, each sign-in works like this: the screen shows a two-digit number, your phone buzzes, and you type that number into the notification and tap Yes.
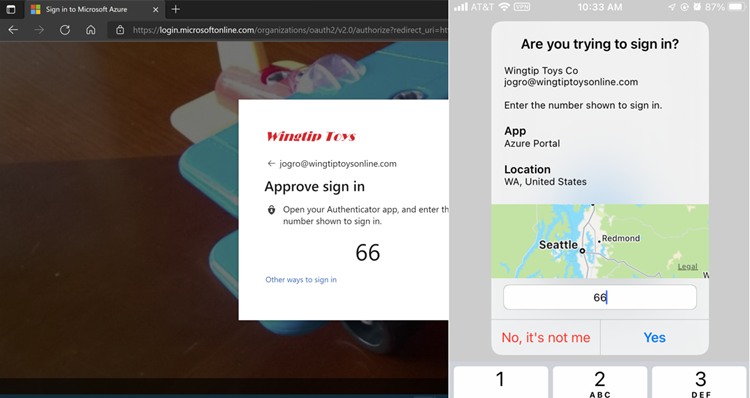
If you get a prompt you did not ask for, do not approve it. Tap No, it's not me and contact Lentner Technology at support@lentner.com right away. An unexpected prompt almost always means someone else has your password.
This method works, but it is a stopgap. Come back to section 4 and set up a passkey when you have five minutes.
7. Getting your bearings
Outlook on the web is laid out in three vertical strips, plus a toolbar across the top.
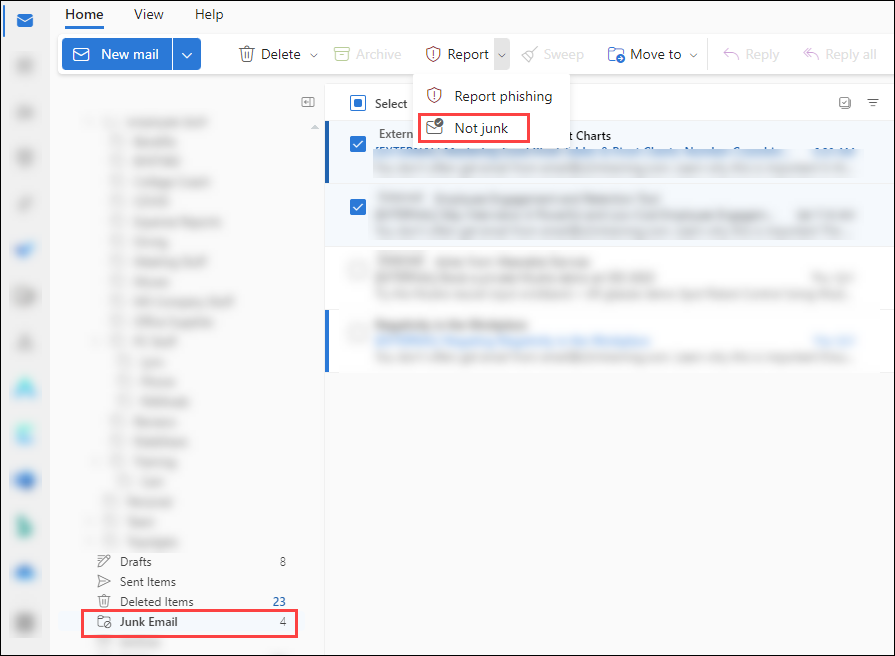
- Far left: a narrow strip of icons that switch between Mail, Calendar, People, and other apps.
- Left panel: your folders. Inbox, Drafts, Sent Items, Deleted Items, Junk Email, and any folders you create.
- Middle: the list of messages in whichever folder you have selected.
- Right: the reading pane, showing the full message you clicked.
- Top: the toolbar, with New mail, Delete, Reply, Move, and other actions.

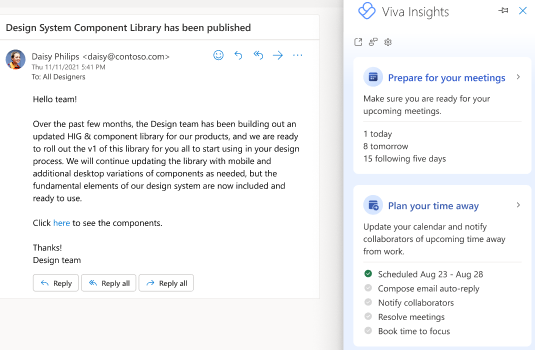
The app launcher
The grid of dots in the very top left corner is the app launcher. Click it to jump to Word, Excel, Teams, OneDrive, and the rest of Microsoft 365 without typing another address.
8. Sending an email
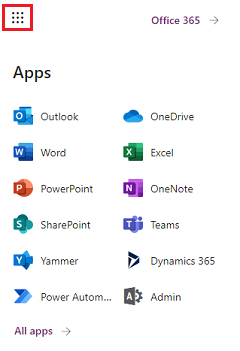
Click New mail at the top left of the toolbar.
In the To line, start typing a name. Colleagues in your company appear automatically as you type, so you rarely need to type a full address.
Add a subject, write your message, then click Send.
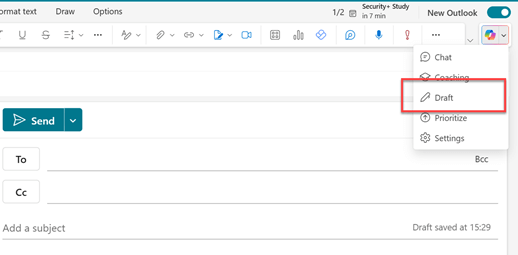
A few things worth knowing:
- Cc and Bcc sit at the right end of the To line. Cc is visible to everyone. Bcc is not.
- Attachments go on with the paperclip button, or by dragging a file straight onto the message.
- Nothing is lost if you close the window. Unfinished messages are saved in the Drafts folder.
- Schedule send hides behind the small arrow next to the Send button, if you want a message to go out later.
9. Folders and search
To make a folder, right-click your name or Inbox in the left panel and choose Create new subfolder. Then drag messages into it, or select a message and use Move to on the toolbar.
Search is usually faster than filing. Click the search box at the top of the window and type any word, name, or phrase. Outlook searches every folder at once, including attachments.
Deleted something by accident? Open Deleted Items in the left panel, right-click the message, and choose Move then Inbox. Items stay recoverable there for about 30 days.
10. Using the calendar
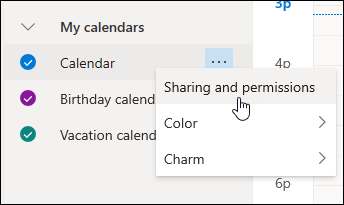
Click the calendar icon in the far-left strip to switch from Mail to Calendar. Your mail stays open in the background, so switching back is one click.
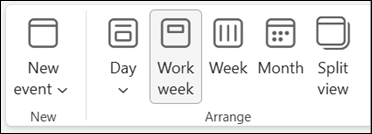
- To create a meeting, click New event, or simply click and drag across the time you want.
- To invite people, add them in the Invite attendees field. Outlook shows whether they are free at that time.
- To make it a Teams meeting, flip the Teams meeting toggle. A join link is added to the invitation for you.
11. Setting up your signature
A signature is the block of contact details added to the bottom of your messages. It is worth setting up on day one.
Click the gear icon in the top right corner to open Settings.
Choose Mail on the left, then Compose and reply.

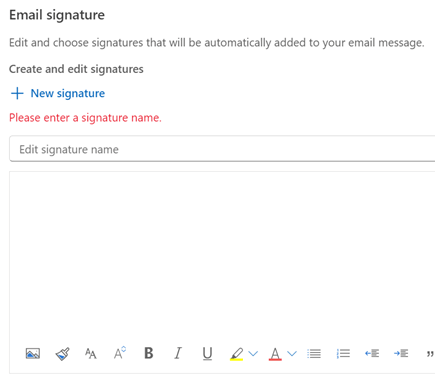
Click + New signature, give it a name such as "Default", and type your details in the box below.
Underneath, set the signature to be used for new messages and for replies and forwards, then click Save.
If your company has a standard signature format, ask before writing your own. Some organizations apply signatures automatically on the server, in which case anything you set here will be added on top of it.
12. Keeping it one click away
Typing the address every morning gets old. Two options:
Bookmark it
With your mailbox open, press Ctrl + D on Windows or Command + D on a Mac, and save it to your bookmarks bar.
Install it as an app
Better still, Edge and Chrome can turn Outlook into what looks and behaves like a normal desktop application, with its own icon and window and no address bar in the way.
In Microsoft Edge: click the three dots in the top right, then Apps, then Install this site as an app.

In Google Chrome: click the three dots in the top right, then Install Outlook. Depending on your Chrome version this may sit under Cast, save and share.

Once installed, you can pin the icon to your taskbar or dock and open your mail the same way you would open any other program.
13. Signing out safely
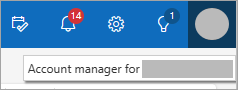
Click your initials or photo in the top right corner, then choose Sign out. Closing the browser tab is not the same thing, and on a shared computer it is not enough.
On a public or borrowed computer, sign out and then close the entire browser window. If you can, use a private or incognito window from the start.
A few habits worth keeping
- Your mailbox works from anywhere, but it is still your company's mail. Treat what you send from a coffee shop the same as what you send from your desk.
- Slow down on unexpected attachments and links, particularly anything asking you to sign in again. When in doubt, forward it to Lentner Technology rather than clicking.
- Never approve an MFA prompt you did not trigger. This is the single most common way accounts get taken over.
- Your password expiring is normal. If you are prompted to change it, do so through the Microsoft prompt itself, never through a link in an email.
Stuck on any of this?
Locked out, not receiving prompts, or seeing something that does not match this guide? Get in touch with Lentner Technology and we will get you back in.
Screenshots courtesy of Microsoft, from the Microsoft Support and Microsoft Learn documentation. Microsoft updates the Outlook interface regularly, so what you see on screen may differ slightly from the images above. Microsoft 365, Outlook, and Microsoft Authenticator are trademarks of Microsoft Corporation.